Security
Supported Authentication Types
- Database
username and password style that is queried from the database to match. Passwords are kept hashed on the database.
- Open ID
Uses the user’s email field to authenticate on Gmail, Yahoo etc…
- LDAP
Authentication against an LDAP server, like Microsoft Active Directory.
- REMOTE_USER
Reads the REMOTE_USER web server environ var, and verifies if it’s authorized with the framework users table. It’s the web server responsibility to authenticate the user, useful for intranet sites, when the server (Apache, Nginx) is configured to use kerberos, no need for the user to login with username and password on F.A.B.
- OAUTH
Authentication using OAUTH (v1 or v2). You need to install authlib.
Configure the authentication type on config.py, take a look at Base Configuration
The session is preserved and encrypted using Flask-Login, OpenID requires Flask-OpenID.
Role based
Each user may have multiple roles, and a role holds permissions on views/API and menus, so a user has permissions on views/API and menus.
Roles can be user defined (backed by the backend) and builtin readonly. Builtin readonly roles support regex for views/API and permissions, this simplifies security management and improve performance since the many to many permissions between a role and it’s permissions does not need to be fetched from the backend.
Builtin roles are defined on the config using FAB_ROLES key and respect the following data structure:
FAB_ROLES = {
    "<ROLE NAME>": [
        ["<VIEW/MENU/API NAME>", "PERMISSION NAME"],
        ....
    ],
    ...
}
So for example a Read Only role might look like:
FAB_ROLES = {
    "ReadOnly": [
        [".*", "can_list"],
        [".*", "can_show"],
        [".*", "menu_access"],
        [".*", "can_get"],
        [".*", "can_info"]
    ]
}
These roles are inserted automatically to the database (only their name is added), and can be associated to users just like a “normal”/user defined role.
If you want to later on change the name of these roles, you can map these roles by their backend id:
FAB_ROLES = {
    "ReadOnly_Altered": [
        [".*", "can_list"],
        [".*", "can_show"],
        [".*", "menu_access"],
        [".*", "can_get"],
        [".*", "can_info"]
    ]
}

FAB_ROLES_MAPPING = {
    1: "ReadOnly_Altered"
}
There are two special roles, you can define their names on the Base Configuration
- Admin Role
Special builtin read only Role, will have full access.
- Public Role
This is a special role for non authenticated users, you can assign all the permissions on views and menus to this role, and everyone will access specific parts of you application.
Of course you can create any additional role you want and configure them as you like.
Permissions
The framework automatically creates for you all the possible existing permissions on your views, API or menus, by “inspecting” your code.
Each time you create a new view based on a model (inherit from ModelView) it will create the following permissions:
can list
can show
can add
can edit
can delete
can download
In the case of CRUD REST API:
can get
can put
can post
can delete
can info
These base permissions will be associated to your view or API, so if you create a view named MyModelView
you can assign to any role the following permissions:
can list on MyModelView
can show on MyModelView
can add on MyModelView
can edit on MyModelView
can delete on MyModelView
can download on MyModelView
In case your developing a backend REST API subclassing ModelRestApi with a class named MyApi will
generate the following permissions:
can get on MyApi
can put on MyApi
can post on MyApi
can delete on MyApi
can info on MyApi
If you extend your view with some exposed method via the @expose decorator and you want to protect it
use the @has_access decorator:
class MyModelView(ModelView):
    datamodel = SQLAInterface(Group)

    @has_access
    @expose('/mymethod/')
    def mymethod(self):
        # do something
        pass
The framework will create the following access, based on your method’s name:
can mymethod on MyModelView
You can aggregate some of your method’s on a single permission, this can simplify the security configuration
if there is no need for granular permissions on a group of methods, for this use @permission_name decorator.
You can use the @permission_name to override the permission’s name to whatever you like.
Take a look at API Reference
Permission Customization
The default view/menu, permissions are highly granular, this is a good default since it enables a high level of customization, but on medium to large application the amount of permission pairs generated can get a bit daunting. You can fully customize the generated permission names generated and if you wish aggregate them:
class OneApi(ModelRestApi):
    datamodel = SQLAInterface(Contact)
    class_permission_name = "api"


class TwoApi(ModelRestApi):
    datamodel = SQLAInterface(Contact)
    class_permission_name = "api"
The previous example will generate half the default permissions, by just creating the following:
can get on api
can put on api
can post on api
can delete on api
can info on api
The class_permission_name property is available also on BaseViews and their children ModelView,
MultipleView, MasterDetailView, FormView, etc.
You can also aggregate method permissions by using method_permission_name attribute.
Use the following Dict structure:
method_permission_name = {
    "<METHOD_NAME>": "<PERMISSION_NAME>",
    ...
}
Example:
class OneApi(ModelRestApi):
    datamodel = SQLAInterface(Contact)
    class_permission_name = "api"
    method_permission_name = {
        "get_list": "access",
        "get": "access",
        "post": "access",
        "put": "access",
        "delete": "access",
        "info": "access"
    }


class TwoApi(ModelRestApi):
    datamodel = SQLAInterface(Contact)
    class_permission_name = "api"
    method_permission_name = {
        "get_list": "access",
        "get": "access",
        "post": "access",
        "put": "access",
        "delete": "access",
        "info": "access"
    }
Now FAB will only generate one permission pair:
can access on api
If you want to revert back your permission names override, or change just them again, you need to hint FAB about what were your last permissions, so that the security converge procedure knows what to do:
class OneApi(ModelRestApi):
    datamodel = SQLAInterface(Contact)
    class_permission_name = "OneApi"
    previous_class_permission_name = "api"
    method_permission_name = {
        "get_list": "get",
        "get": "get",
        "post": "post",
        "put": "put",
        "delete": "delete",
        "info": "info"
    }
    previous_method_permission_name = {
        "get_list": "access",
        "get": "access",
        "post": "access",
        "put": "access",
        "delete": "access",
        "info": "access"
    }
An example for compressing permissions using MVC Model Views:
class OneView(ModelView):
    datamodel = SQLAInterface(Contact)
    class_permission_name = "view"
    method_permission_name = {
        'add': 'write',
        'delete': 'write',
        'download': 'write',
        'edit': 'write',
        'list': 'read',
        'muldelete': 'write',
        'show': 'read',
        'api': 'read',
        'api_column_add': 'write',
        'api_column_edit': 'write',
        'api_create': 'write',
        'api_delete': 'write',
        'api_get': 'read',
        'api_read': 'read',
        'api_readvalues': 'read',
        'api_update': 'write'
    }
Note that if your changing an already existing application, you need to migrate the old permission names to the new
ones. Before doing that you should disable the boot automatic create/delete permissions,
so set FAB_UPDATE_PERMS = False. Then run the following FAB cli command:
$ flask fab security-converge
Security converge will migrate all your permissions from the previous names to the current names, and
also change all your roles, so you can migrate smoothly to your new security naming. After converging
you can delete all your previous_* attributes if you have set them.
You can also migrate back by switching previous_* attributes to their target, ie switch
previous_method_permission_name by method_permission_name and
previous_class_permission_name by class_permission_name.
Then run security converge will expand back all permissions
on all your Roles.
- note
You should backup your production database before migrating your permissions. Also note that you can run
flask fab security-converge --dry-runto get a list of operations the converge will perform.
Automatic Cleanup
All your permissions and views are added automatically to the backend and associated with the ‘Admin’ role. The same applies to removing them. But, if you change the name of a view or menu, the framework will add the new Views and Menus names to the backend, but will not delete the old ones. It will generate unwanted names on the security models, basically garbage. To clean them, use the security_cleanup method.
Using security_cleanup is not always necessary, but using it after code rework, will guarantee that the permissions, and associated permissions to menus and views are exactly what exists on your app. It will prevent orphaned permission names and associations.
Use the cleanup after you have registered all your views.
appbuilder.add_view(GroupModelView, "List Groups", category="Contacts")
appbuilder.add_view(ContactModelView, "List Contacts", category="Contacts")
appbuilder.add_separator("Contacts")
appbuilder.add_view(ContactChartView, "Contacts Chart", category="Contacts")
appbuilder.add_view(ContactTimeChartView, "Contacts Birth Chart", category="Contacts")

appbuilder.security_cleanup()
You can always use it and everything will be painlessly automatic. But if you use it only when needed (change class name, add security_cleanup to your code, the garbage names are removed, then remove the method) no overhead is added when starting your site.
Auditing
All user’s creation and modification are audited. On the show detail for each user you can check who created the user and when and who has last changed it.
You can check also, a total login count (successful login), and the last failed logins (these are reset if a successful login occurred).
If you’re using SQLAlchemy you can mix auditing to your models in a simple way. Mix AuditMixin class to your models:
from flask_appbuilder.models.mixins import AuditMixin
from flask_appbuilder import Model
from sqlalchemy import Column, Integer, String


class Project(AuditMixin, Model):
    id = Column(Integer, primary_key=True)
    name = Column(String(150), unique=True, nullable=False)
This will add the following columns to your model:
created_on: The date and time of the record creation.
changed_on: The last date and time of record update.
created_by: Who created the record.
changed_by: Who last modified the record.
These columns will be automatically updated by the framework upon creation or update of records. So you should exclude them from add and edit form. Using our example you will define our view like this:
class ProjectModelView(ModelView):
    datamodel = SQLAInterface(Project)
    add_columns = ['name']
    edit_columns = ['name']
Authentication Methods
We are now looking at the authentication methods, and how you can configure them and customize them. The framework has 5 authentication methods and you choose one of them, you configure the method to be used on the config.py (when using the create-app, or following the proposed app structure). First the configuration imports the constants for the authentication methods:
from flask_appbuilder.security.manager import (
    AUTH_DB,
    AUTH_LDAP,
    AUTH_OAUTH,
    AUTH_OID,
    AUTH_REMOTE_USER
)
Next you will use the AUTH_TYPE key to choose the type:
AUTH_TYPE = AUTH_DB
Additionally you can customize the name of the builtin roles for Admin and Public accesses:
AUTH_ROLE_ADMIN = 'My Admin Role Name'
AUTH_ROLE_PUBLIC = 'My Public Role Name'
Finally you can allow users to self register (take a look at the following chapters for further detail):
AUTH_USER_REGISTRATION = True
AUTH_USER_REGISTRATION_ROLE = "My Public Role Name"
These settings can apply to all the authentication methods. When you create your first admin user using flask fab command line, this user will be authenticated using the authentication method defined on your config.py.
Authentication: Database
The database authentication type is the most simple one, it authenticates users against an username and hashed password field kept on your database.
Administrators can create users with passwords, and users can change their passwords. This is all done using the UI. (You can override and extend the default UI as we’ll see on Your Custom Security)
Authentication: OpenID
This authentication method uses Flask-OpenID. All configuration is done on config.py using OPENID_PROVIDERS key, just add or remove from the list the providers you want to enable:
AUTH_TYPE = AUTH_OID
OPENID_PROVIDERS = [
    { 'name': 'Yahoo', 'url': 'https://me.yahoo.com' },
    { 'name': 'AOL', 'url': 'http://openid.aol.com/<username>' },
    { 'name': 'Flickr', 'url': 'http://www.flickr.com/<username>' },
    { 'name': 'MyOpenID', 'url': 'https://www.myopenid.com' }
]
Each list entry is a dict with a readable OpenID name and it’s url, if the url needs an username just add it using <username>. The login template for this method will provide a text box for the user to fillout his/her username.
F.A.B. will ask for the ‘email’ from OpenID, and if this email belongs to some user on your application he/she will login successfully.
Authentication: LDAP
This method will authenticate the user’s credentials against an LDAP server. Using this method without self user registration is very simple, for MSFT AD just define the LDAP server:
AUTH_TYPE = AUTH_LDAP
AUTH_LDAP_SERVER = "ldap://ldapserver.local"
AUTH_LDAP_USE_TLS = False
For OpenLDAP or if you need/want to bind first with a query LDAP user, then using username to search the LDAP server and binding to it (using the user provided password):
AUTH_TYPE = AUTH_LDAP
AUTH_LDAP_SERVER = "ldap://ldapserver.local"
AUTH_LDAP_USE_TLS = False
AUTH_LDAP_SEARCH = "dc=domain,dc=local"
AUTH_LDAP_BIND_USER = "CN=Query User,OU=People,dc=domain,dc=local"
AUTH_LDAP_BIND_PASSWORD = "password"
for MSFT AD users will be authenticated using the attribute ‘userPrincipalName’, so username’s will be of the form ‘someuser@somedomail.local’. Since 1.6.1 you can use a new configuration to set all domains to a certain default, this will allow users to authenticate using ‘someuser’ be setting:
AUTH_LDAP_APPEND_DOMAIN = 'somedomain.local'
When using self user registration, you can use the following to config further:
- AUTH_LDAP_UID_FIELD
Default to ‘uid’ will be used to search the user on the LDAP server. For MSFT AD you can set it to ‘userPrincipalName’
- AUTH_LDAP_FIRSTNAME_FIELD
Default to ‘givenName’ will use MSFT AD attribute to register first_name on the db.
- AUTH_LDAP_LASTTNAME_FIELD
Default to ‘sn’ will use MSFT AD attribute to register last_name on the db.
- AUTH_LDAP_EMAIL_FIELD
Default to ‘mail’ will use MSFT AD attribute to register email on the db. If this attribute is null the framework will register <username + ‘@email.notfound’>
- AUTH_LDAP_SEARCH
This must be set when using self user registration.
Authentication: OAuth
By using this method it will be possible to use the provider API, this is because you’re requesting the user to give permission to your app to access or manage the user’s account on the provider.
So you can send tweets, post on the users facebook, retrieve the user’s linkedin profile etc.
To use OAuth you need to install AuthLib. It’s useful to get to know this library since F.A.B. will expose the remote application object for you to play with.
Take a look at the example to get an idea of a simple use for this.
Use config.py configure OAUTH_PROVIDERS with a list of oauth providers, notice that the remote_app key is just the configuration for authlib:
AUTH_TYPE = AUTH_OAUTH

OAUTH_PROVIDERS = [
    {'name':'twitter', 'icon':'fa-twitter',
        'remote_app': {
            'client_id':'TWITTER KEY',
            'client_secret':'TWITTER SECRET',
            'api_base_url':'https://api.twitter.com/1.1/',
            'request_token_url':'https://api.twitter.com/oauth/request_token',
            'access_token_url':'https://api.twitter.com/oauth/access_token',
            'authorize_url':'https://api.twitter.com/oauth/authenticate'}
    },
    {'name':'google', 'icon':'fa-google', 'token_key':'access_token',
        'remote_app': {
            'client_id':'GOOGLE KEY',
            'client_secret':'GOOGLE SECRET',
            'api_base_url':'https://www.googleapis.com/oauth2/v2/',
            'client_kwargs':{
              'scope': 'email profile'
            },
            'request_token_url':None,
            'access_token_url':'https://accounts.google.com/o/oauth2/token',
            'authorize_url':'https://accounts.google.com/o/oauth2/auth'}
    },
    {'name':'openshift', 'icon':'fa-circle-o', 'token_key':'access_token',
        'remote_app': {
            'client_id':'system:serviceaccount:mynamespace:mysa',
            'client_secret':'<mysa serviceaccount token here>',
            'api_base_url':'https://openshift.default.svc.cluster.local:443',
            'client_kwargs':{
              'scope': 'user:info'
            },
            'redirect_uri':'https://myapp-mynamespace.apps.<cluster_domain>',
            'access_token_url':'https://oauth-openshift.apps.<cluster_domain>/oauth/token',
            'authorize_url':'https://oauth-openshift.apps.<cluster_domain>/oauth/authorize',
            'token_endpoint_auth_method':'client_secret_post'}
    }
]
This needs a small explanation, you basically have five special keys:
- name
The name of the provider, you can choose whatever you want. But the framework as some builtin logic to retrieve information about a user that you can make use of if you choose: ‘twitter’, ‘google’, ‘github’, ‘linkedin’, ‘openshift’.
- icon
The font-awesome icon for this provider.
- token_key
The token key name that this provider uses, google and github uses ‘access_token’, twitter uses ‘oauth_token’ and thats the default.
- token_secret
The token secret key name, default is ‘oauth_token_secret’
After the user authenticates and grants access permissions to your application the framework retrieves information about the user, username and email. This info will be checked with the internal user (user record on User Model), first by username next by email.
To override/customize the user information retrieval from oauth, you can create your own method like this:
@appbuilder.sm.oauth_user_info_getter
def my_user_info_getter(sm, provider, response=None):
    if provider == 'github':
        me = sm.oauth_remotes[provider].get('user')
        return {'username': me.json().get('login')}
    else:
        return {}
Decorate your method with the SecurityManager oauth_user_info_getter decorator. Make your method accept the exact parameters as on this example, and then return a dictionary with the retrieved user information. The dictionary keys must have the same column names as the User Model. Your method will be called after the user authorizes your application on the OAuth provider, and it will receive the following: sm is F.A.B’s SecurityManager class, provider is a string with the name you configured this provider with, response is the response.
Take a look at the example
Your Custom Security
If you want to alter the security views, or authentication methods since (1.0.1) you can do it in a simple way. The AppBuilder has a new optional initialization parameter where you pass your own custom SecurityManager If you want to add, for example, actions to the list of users you can do it in a simple way.
First i advise you to create security.py and add the following to it:
from flask import redirect
from flask_appbuilder.security.views import UserDBModelView
from flask_appbuilder.security.sqla.manager import SecurityManager
from flask_appbuilder.actions import action


class MyUserDBView(UserDBModelView):
    @action("muldelete", "Delete", "Delete all Really?", "fa-rocket", single=False)
    def muldelete(self, items):
        self.datamodel.delete_all(items)
        self.update_redirect()
        return redirect(self.get_redirect())


class MySecurityManager(SecurityManager):
    userdbmodelview = MyUserDBView
Then on the __init__.py initialize AppBuilder with you own security class:
appbuilder = AppBuilder(app, db.session, security_manager_class=MySecurityManager)
Alternatively since 1.13.1 you can declare your custom SecurityManager on the config. This is a must have if your using the factory app pattern, on the config declare you class the following way:
FAB_SECURITY_MANAGER_CLASS='app.security.MySecurityManager'
F.A.B. uses a different user view for each authentication method
- UserDBModelView
For database auth method
- UserOIDModelView
For Open ID auth method
- UserLDAPModelView
For LDAP auth method
You can extend or create from scratch your own, and then tell F.A.B. to use them instead, by overriding their correspondent lower case properties on SecurityManager (just like on the given example).
Take a look and run the example on Employees example
Study the source code of BaseSecurityManager
Extending the User Model
If you want to extend the User Model with extra columns specific to your application (since 1.3.0) you can easily do it. Use the same type of approach as explained earlier.
First extend the User Model (create a sec_models.py file):
from flask_appbuilder.security.sqla.models import User
from sqlalchemy import Column, Integer, ForeignKey, String, Sequence, Table
from sqlalchemy.orm import relationship, backref
from flask_appbuilder import Model

class MyUser(User):
    __tablename__ = 'ab_user'
    extra = Column(String(256))
Next define a new User view, just like the default User view but with the extra column (create a sec_view.py) If you’re using:
- AUTH_DB
Extend UserDBModelView
- AUTH_LDAP
Extend UserLDAPModelView
- AUTH_REMOTE_USER
Extend UserRemoteUserModelView
- AUTH_OID
Extend UserOIDModelView
- AUTH_OAUTH
Extend UserOAuthModelView
So using AUTH_DB:
from flask_appbuilder.security.views import UserDBModelView
from flask_babelpkg import lazy_gettext

class MyUserDBModelView(UserDBModelView):
    """
        View that add DB specifics to User view.
        Override to implement your own custom view.
        Then override userdbmodelview property on SecurityManager
    """

    show_fieldsets = [
        (lazy_gettext('User info'),
         {'fields': ['username', 'active', 'roles', 'login_count', 'extra']}),
        (lazy_gettext('Personal Info'),
         {'fields': ['first_name', 'last_name', 'email'], 'expanded': True}),
        (lazy_gettext('Audit Info'),
         {'fields': ['last_login', 'fail_login_count', 'created_on',
                     'created_by', 'changed_on', 'changed_by'], 'expanded': False}),
    ]

    user_show_fieldsets = [
        (lazy_gettext('User info'),
         {'fields': ['username', 'active', 'roles', 'login_count', 'extra']}),
        (lazy_gettext('Personal Info'),
         {'fields': ['first_name', 'last_name', 'email'], 'expanded': True}),
    ]

    add_columns = [
        'first_name',
        'last_name',
        'username',
        'active',
        'email',
        'roles',
        'extra',
        'password',
        'conf_password'
    ]
    list_columns = [
        'first_name',
        'last_name',
        'username',
        'email',
        'active',
        'roles'
    ]
    edit_columns = [
        'first_name',
        'last_name',
        'username',
        'active',
        'email',
        'roles',
        'extra'
    ]
Next create your own SecurityManager class, overriding your model and view for User (create a sec.py):
from flask_appbuilder.security.sqla.manager import SecurityManager
from .sec_models import MyUser
from .sec_views import MyUserDBModelView

class MySecurityManager(SecurityManager):
    user_model = MyUser
    userdbmodelview = MyUserDBModelView
Note that this is for AUTH_DB, so if you’re using:
- AUTH_DB
Override userdbmodelview
- AUTH_LDAP
Override userldapmodelview
- AUTH_REMOTE_USER
Override userremoteusermodelview
- AUTH_OID
Override useroidmodelview
Finally (as shown on the previous example) tell F.A.B. to use your SecurityManager class, so when initializing AppBuilder (on __init__.py):
from flask import Flask
from flask_appbuilder import SQLA, AppBuilder
from flask_appbuilder.menu import Menu
from .sec import MySecurityManager

app = Flask(__name__)
app.config.from_object('config')
db = SQLA(app)
appbuilder = AppBuilder(app, db.session, menu=Menu(reverse=False), security_manager_class=MySecurityManager)

from app import views
Now you’ll have your extended User model as the authenticated user, g.user will have your model with the extra col.
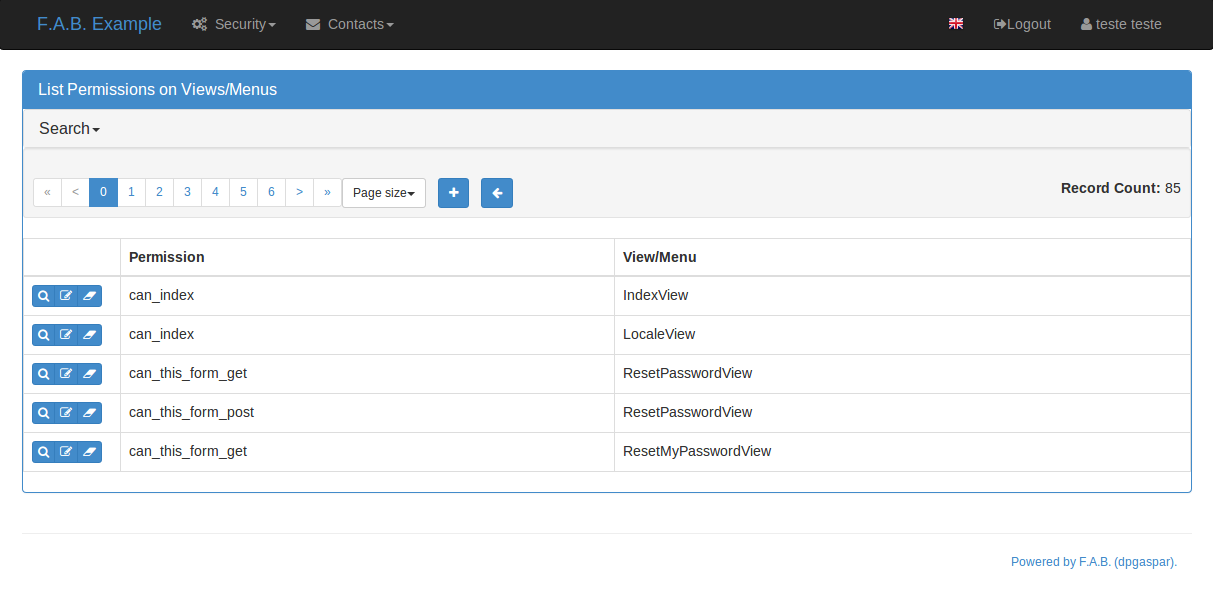
Some images: